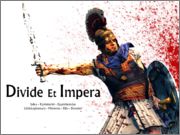
Warlord's Hold
With great power comes great responsibility.Many of the tribal leaders who fought the Romans are remembered as noble adversaries who stood against the Roman war machine but were ultimately crushed by it. There were those who chose to accept Roman rule in order to protect their people. Cartimandua, queen of the Briganti tribe in Britannia, chose to ally herself with Rome after witnessing the devastation of the southern British tribes. Fleeing for his life, the leader of the Catuvellauni tribe, Caratacus, sought refuge with Cartimandua. Rather than break her alliance with Rome she gave up Caratacus to the Romans in chains. Her peace was eventually broken when her ex-husband rose up against her, plunging her people back into war with Rome.
City Centre
Building Name Warlord's Hold |
Level Name rom_BARBARIAN_commons_administration_3 |
Building Chain City Centre |
Building Level 3 |
Create Time 10 |
Create Cost 7800 |
Require Resource  Marble |
Require Technology  War Horn |
Effects
 -4 public order(squalor) (this_province)
 +2 experience for new dignitaries (this_province)
 [NOT DISPLAYED] Drives the road levels between settlements (this_region)
 +4% tax rate (this_province)
 +0.5% 1st Class Citizen (this_building)
 [NOT DISPLAYED] Drives the road levels between settlements (this_region)
Provides Garrison Army
Recruitable Units
| Recruitable Units Lv. 0 | ||||||||||||||||||
|---|---|---|---|---|---|---|---|---|---|---|---|---|---|---|---|---|---|---|
| No. | Unit | Sol. | Costom Cost | Recru. Cost | Unkeep Cost | Ship HP. | Ship Spd. | Msl. Dmg. | Rng. | Sht. /min | Amo. | Mle. Atk. | Mle. Dmg. | Chg. | Mle. Def. | Arm. | HP. | Mor. |
| 1 |
Cavalry / Missile Cavalry / (Ste_Noble_Horse_Archers) Ysaninu Aysna (Saka Noble Horse Archers) Protected with helmets and good quality scale armour, riding horses with frontal barding, and wielding stout spears, these Saka nobles can give a good account of themselves in hand to hand combat. Also, they are no less adept with the strong, composite bows they carry than poorer, more lightly-equipped horse archers and only slightly less agile. This combination makes them suitable for a variety of tasks. |
|||||||||||||||||
| 120 | 2483 | 2483 | 11 | 160 | 7 | 15 | 39 | 9 | 35 | 48 | 22 | 20 | 65 | |||||
| 2 |
Cavalry / Missile Cavalry / (Ste_Sarmatian_Royal_Lancers) Yukhuna Ysaninu Purma (Yuezhi Noble Cavalry) These mounted nobles are lightly armoured medium cavalry, able to skirmish with their bows and mount a desperate charge with their lances. They wield their bows with skill, and handle their lances well. |
|||||||||||||||||
| 120 | 1234 | 1234 | 11 | 160 | 5 | 15 | 34 | 9 | 33 | 42 | 6 | 20 | 60 | |||||
| 3 |
Cavalry / Shock Cavalry / (Ste_Scythian_Royal_Horse) Sahiya Hadabara (Late Saka Cataphracts) These men represent the champions of Indo-Saka society that have distinguished themselves as a feared force of crack cavalry. Armoured with a lamellar cuirass and helmet along with laminated trousers and laminated arm defences, and with their chargers armoured in a complete lamellar barding, these cataphracts boast defences as formidable as their Parthian rivals to the west. |
|||||||||||||||||
| 120 | 2902 | 2902 | 50 | 9 | 46 | 61 | 28 | 20 | 65 | |||||||||
| Disqus |
|---|
|
|


 Français
 Italiano
 Deutsch
 Español
 Русский
 Čeština
 Polski
 Türkçe
 简体中文
简体中文 正體中文
正體中文 日本語
日本語
