

 English
 Italiano
 Deutsch
 Español
 Русский
 Čeština
 Polski
 Türkçe
 Português (Brasil)
 한국어
한국어 简体中文
简体中文 正體中文
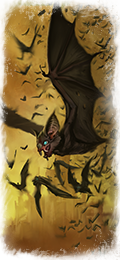
正體中文Chauves-souris Géantes
Comme les Chauves-souris Géantes fondent sur leurs ennemis en masse, elles deviennent vite beaucoup trop nombreuses.Aussi grosses qu'un homme adulte, les Chauves-souris Géantes sont une vision d'horreur. Elles sont aussi noires que la nuit et aussi silencieuses que la mort, même en plein vol. Le seul son émis par une Chauves-souris Géante en chasse est l'horrible gargouillis glaireux de sa gueule distendue mordant dans la chair fraîche. En vérité, la Chauve-Souris Géante est à la chauve-souris ordinaire ce que le lion enragé est au chat domestique. Ceux qui en ont vu une, et lui ont survécu, évoquent la mortelle précision de la bête, piquant pour jeter un chevalier à bas de sa monture ou emporter un guerrier esseulé. Un Vampire considère ces créatures comme un seigneur bretonnien ses faucons apprivoisés. Des morceaux de choix leur sont jetés en pâture du haut des remparts, mais pour en attirer toute une volée, un sacrifice plus grandiose est nécessaire. Une victime au ventre ouvert et implorante, ou un messager terrifié envoyé dans la nuit après lui avoir arraché les yeux est davantage à leur goût. Une fois perçue l'odeur du sang, elles fondent sur leur proie pour étancher leur soif.
 |
Unit Name Chauves-souris Géantes |
Main Unit Key wh_main_vmp_mon_fell_bats |
Land Unit Key wh_main_vmp_mon_fell_bats |
Naval Unit Key wh_main_shp_transport |
Land Unit Group |
Naval Unit Group |
Soldiers 60 |
Caste Bête de guerre |
Category Infanterie de mêlée |
Class Infanterie de mêlée |
Prix 350 |
Coût de recrutement 350 |
Coût d'entretien 88 |
Melee Attack 14 |
Weapon Strength (Weapon Damage) 22 |
├ Melee Weapon wh_main_vmp_fell_bats |
├ Melee Damage Base 20 |
├ Melee Damage Ap 2 |
├ Armour Piercing No |
├ Bonus vs Cavalry 0 |
├ Bonus vs Elephants 0 |
└ Bonus vs Infantry 0 |
Charge Bonus 6 |
Melee Defence 44 |
├ Base Defence 44 |
├ Shield none |
└ Shield Defence 0 |
Armour 0 |
├ Armour wh_main_body_0 |
├ Armour Defence 0 |
└ Shield Armour 0 |
Health 70 |
├ Man Entity wh_main_flying_fell_bat_blood |
├ Man Speed 70 |
├ Man Health 8 |
└ Bonus Hit Points 62 |
Leadership (Base Morale) 30 |
Capacités
- Effondrement
Les morts n'ont pas la vie facile dans le Vieux Monde. Ceux appelés par les Vampires et les Nécromanciens sont débarrassés de leurs soucis de mortels : ils sont uniquement au service de leur maître. - Désintégration
La Magie Noire a échoué. Les énergies de la chair et de nécromancie se débarrassent des sujets, ne laissant rien d'autre que de la poussière.
Attributes
- Provoque la peur
Cette unité effraie toutes les unités ennemies, réduisant leur commandement lorsqu'elles sont à proximité. Elle est également immunisée contre la peur. Les pénalités dues à la peur ne s'additionnent pas. - {{tr:wh2_dlc09_undead_description}}
FORCES & FAIBLESSES
- Faible contre les armures
Les attaques de cette unité peuvent à peine perforer les armures et ne servent donc à rien contre les ennemis à armure lourde.
| Requiert Bâtiments | |
|---|---|
|
Bosquet sinistre
(wh_main_vmp_forest_1) Level 0
Bois des Abysses
(wh_main_vmp_forest_2) Level 1
Catacombes du Château Drachenfels
(wh2_main_special_castle_drachenfels_1) Level 0
Bibliothèque du Château Drachenfels
(wh2_main_special_castle_drachenfels_2) Level 1 |
|
| Garnison Bâtiments | |
|---|---|
|
Occupation d'Altdorf (Hameau décrépit)
(wh_main_special_settlement_altdorf_1_vmp) Level 1
Occupation d'Altdorf (Village contaminé)
(wh_main_special_settlement_altdorf_2_vmp) Level 2
Occupation d'Altdorf (Ville ténébreuse)
(wh_main_special_settlement_altdorf_3_vmp) Level 3
Occupation d'Altdorf (Cité maudite)
(wh_main_special_settlement_altdorf_4_vmp) Level 4
Drakenhof (Hameau décrépit)
(wh_main_special_settlement_castle_drakenhof_1_vmp) Level 1
Drakenhof (Village contaminé)
(wh_main_special_settlement_castle_drakenhof_2_vmp) Level 2
Drakenhof (Ville ténébreuse)
(wh_main_special_settlement_castle_drakenhof_3_vmp) Level 3
Château Drakenhof (Cité maudite)
(wh_main_special_settlement_castle_drakenhof_4_vmp) Level 4
Occupation de Couronne (Hameau décrépit)
(wh_main_special_settlement_couronne_1_vmp) Level 1
Occupation de Couronne (Village contaminé)
(wh_main_special_settlement_couronne_2_vmp) Level 2
Occupation de Couronne (Ville ténébreuse)
(wh_main_special_settlement_couronne_3_vmp) Level 3
Occupation de Couronne (Cité maudite)
(wh_main_special_settlement_couronne_4_vmp) Level 4
Occupation de Kislev (Hameau décrépit)
(wh_main_special_settlement_kislev_1_vmp) Level 1
Occupation de Kislev (Village contaminé)
(wh_main_special_settlement_kislev_2_vmp) Level 2
Occupation de Kislev (Ville ténébreuse)
(wh_main_special_settlement_kislev_3_vmp) Level 3
Occupation de Kislev (Cité maudite)
(wh_main_special_settlement_kislev_4_vmp) Level 4
Occupation de Miragliano (Hameau décrépit)
(wh_main_special_settlement_miragliano_1_vmp) Level 1
Occupation de Miragliano (Village contaminé)
(wh_main_special_settlement_miragliano_2_vmp) Level 2
Occupation de Miragliano (Ville ténébreuse)
(wh_main_special_settlement_miragliano_3_vmp) Level 3
Occupation de Miragliano (Cité maudite)
(wh_main_special_settlement_miragliano_4_vmp) Level 4
Hameau décrépit
(wh_main_vmp_outpostnorsca_major_1) Level 1
Hameau décrépit
(wh_main_vmp_outpostnorsca_major_1_coast) Level 1
Village contaminé
(wh_main_vmp_outpostnorsca_major_2) Level 2
Village contaminé
(wh_main_vmp_outpostnorsca_major_2_coast) Level 2
Ville ténébreuse
(wh_main_vmp_outpostnorsca_major_3) Level 3
Ville ténébreuse
(wh_main_vmp_outpostnorsca_major_3_coast) Level 3
Cité maudite
(wh_main_vmp_outpostnorsca_major_4) Level 4
Cité maudite
(wh_main_vmp_outpostnorsca_major_4_coast) Level 4
Village contaminé
(wh_main_vmp_outpostnorsca_minor_2) Level 2
Village contaminé
(wh_main_vmp_outpostnorsca_minor_2_coast) Level 2
Ville ténébreuse
(wh_main_vmp_outpostnorsca_minor_3) Level 3
Ville ténébreuse
(wh_main_vmp_outpostnorsca_minor_3_coast) Level 3
Hameau décrépit
(wh_main_vmp_settlement_major_1) Level 1
Hameau décrépit
(wh_main_vmp_settlement_major_1_coast) Level 1
Village contaminé
(wh_main_vmp_settlement_major_2) Level 2
Village contaminé
(wh_main_vmp_settlement_major_2_coast) Level 2
Ville ténébreuse
(wh_main_vmp_settlement_major_3) Level 3
Ville ténébreuse
(wh_main_vmp_settlement_major_3_coast) Level 3
Cité maudite
(wh_main_vmp_settlement_major_4) Level 4
Cité maudite
(wh_main_vmp_settlement_major_4_coast) Level 4
Village contaminé
(wh_main_vmp_settlement_minor_2) Level 2
Village contaminé
(wh_main_vmp_settlement_minor_2_coast) Level 2
Ville ténébreuse
(wh_main_vmp_settlement_minor_3) Level 3
Ville ténébreuse
(wh_main_vmp_settlement_minor_3_coast) Level 3
Pyramide Noire de Nagash occupée (Hameau décrépit)
(wh2_dlc09_special_settlement_pyramid_of_nagash_vmp_1) Level 1
Pyramide Noire de Nagash occupée (Village contaminé)
(wh2_dlc09_special_settlement_pyramid_of_nagash_vmp_2) Level 2
Pyramide Noire de Nagash occupée (Ville ténébreuse)
(wh2_dlc09_special_settlement_pyramid_of_nagash_vmp_3) Level 3
Pyramide Noire de Nagash occupée (Cité maudite)
(wh2_dlc09_special_settlement_pyramid_of_nagash_vmp_4) Level 4
Poste avancé en forêt (Hameau décrépit)
(wh2_main_special_settlement_athel_loren_vmp_1) Level 1
Poste avancé en forêt (Village contaminé)
(wh2_main_special_settlement_athel_loren_vmp_2) Level 2
Poste avancé en forêt (Ville ténébreuse)
(wh2_main_special_settlement_athel_loren_vmp_3) Level 3
Poste avancé en forêt (Cité maudite)
(wh2_main_special_settlement_athel_loren_vmp_4) Level 4
Pic Noir occupé (niveau 1)
(wh2_main_special_settlement_black_crag_vmp_1) Level 1
Pic Noir occupé (niveau 2)
(wh2_main_special_settlement_black_crag_vmp_2) Level 2
Pic Noir occupé (niveau 3)
(wh2_main_special_settlement_black_crag_vmp_3) Level 3
Pic Noir occupé (niveau 4)
(wh2_main_special_settlement_black_crag_vmp_4) Level 4
Karak aux Huit Pics occupé (niveau 1)
(wh2_main_special_settlement_eight_peaks_vmp_1) Level 1
Karak aux Huit Pics occupé (niveau 2)
(wh2_main_special_settlement_eight_peaks_vmp_2) Level 2
Karak aux Huit Pics occupé (niveau 3)
(wh2_main_special_settlement_eight_peaks_vmp_3) Level 3
Karak aux Huit Pics occupé (niveau 4)
(wh2_main_special_settlement_eight_peaks_vmp_4) Level 4
Val de Gaean occupé (niveau 1)
(wh2_main_special_settlement_gaean_vale_vmp_1) Level 1
Val de Gaean occupé (niveau 2)
(wh2_main_special_settlement_gaean_vale_vmp_2) Level 2
Val de Gaean occupé (niveau 3)
(wh2_main_special_settlement_gaean_vale_vmp_3) Level 3
Val de Gaean occupé (niveau 4)
(wh2_main_special_settlement_gaean_vale_vmp_4) Level 4
Malefosse occupée
(niveau 1) (wh2_main_special_settlement_hellpit_other_1) Level 1
Malefosse occupée
(niveau 2) (wh2_main_special_settlement_hellpit_other_2) Level 2
Malefosse occupée
(niveau 3) (wh2_main_special_settlement_hellpit_other_3) Level 3
Malefosse occupée
(niveau 4) (wh2_main_special_settlement_hellpit_other_4) Level 4
Hexoatl occupée
(niveau 1) (wh2_main_special_settlement_hexoatl_vmp_1) Level 1
Hexoatl occupée
(niveau 2) (wh2_main_special_settlement_hexoatl_vmp_2) Level 2
Hexoatl occupée
(niveau 3) (wh2_main_special_settlement_hexoatl_vmp_3) Level 3
Hexoatl occupée
(niveau 4) (wh2_main_special_settlement_hexoatl_vmp_4) Level 4
Itza occupée (niveau 1)
(wh2_main_special_settlement_itza_vmp_1) Level 1
Itza occupée (niveau 2)
(wh2_main_special_settlement_itza_vmp_2) Level 2
Itza occupée (niveau 3)
(wh2_main_special_settlement_itza_vmp_3) Level 3
Itza occupée (niveau 4)
(wh2_main_special_settlement_itza_vmp_4) Level 4
Karaz-a-Karak occupé (niveau 1)
(wh2_main_special_settlement_karaz_a_karak_vmp_1) Level 1
Karaz-a-Karak occupé (niveau 2)
(wh2_main_special_settlement_karaz_a_karak_vmp_2) Level 2
Karaz-a-Karak occupé (niveau 3)
(wh2_main_special_settlement_karaz_a_karak_vmp_3) Level 3
Karaz-a-Karak occupé (niveau 4)
(wh2_main_special_settlement_karaz_a_karak_vmp_4) Level 4
Khemri occupée (Hameau décrépit)
(wh2_main_special_settlement_khemri_vmp_1) Level 1
Khemri occupée (Village contaminé)
(wh2_main_special_settlement_khemri_vmp_2) Level 2
Khemri occupée (Ville ténébreuse)
(wh2_main_special_settlement_khemri_vmp_3) Level 3
Khemri occupée (Cité maudite)
(wh2_main_special_settlement_khemri_vmp_4) Level 4
Konquata occupée (Hameau décrépit)
(wh2_main_special_settlement_konquata_vmp_1) Level 1
Konquata occupée (Village contaminé)
(wh2_main_special_settlement_konquata_vmp_2) Level 2
Konquata occupée (Ville ténébreuse)
(wh2_main_special_settlement_konquata_vmp_3) Level 3
Konquata occupée (Cité maudite)
(wh2_main_special_settlement_konquata_vmp_4) Level 4
Lahmia occupée (Hameau décrépit)
(wh2_main_special_settlement_lahmia_vmp_1) Level 1
Lahmia occupée (Village contaminé)
(wh2_main_special_settlement_lahmia_vmp_2) Level 2
Lahmia occupée (Ville ténébreuse)
(wh2_main_special_settlement_lahmia_vmp_3) Level 3
Lahmia occupée (Cité maudite)
(wh2_main_special_settlement_lahmia_vmp_4) Level 4
Lothern occupée
(niveau 1) (wh2_main_special_settlement_lothern_vmp_1) Level 1
Lothern occupée
(niveau 2) (wh2_main_special_settlement_lothern_vmp_2) Level 2
Lothern occupée
(niveau 3) (wh2_main_special_settlement_lothern_vmp_3) Level 3
Lothern occupée
(niveau 4) (wh2_main_special_settlement_lothern_vmp_4) Level 4
Naggarond occupé (niveau 1)
(wh2_main_special_settlement_naggarond_vmp_1) Level 1
Naggarond occupé (niveau 2)
(wh2_main_special_settlement_naggarond_vmp_2) Level 2
Naggarond occupé (niveau 3)
(wh2_main_special_settlement_naggarond_vmp_3) Level 3
Naggarond occupé (niveau 4)
(wh2_main_special_settlement_naggarond_vmp_4) Level 4
Sartosa occupée (niveau 1)
(wh2_main_special_settlement_sartosa_vmp_1) Level 1
Sartosa occupée (niveau 2)
(wh2_main_special_settlement_sartosa_vmp_2) Level 2
Sartosa occupée (niveau 3)
(wh2_main_special_settlement_sartosa_vmp_3) Level 3
Sartosa occupée (niveau 4)
(wh2_main_special_settlement_sartosa_vmp_4) Level 4
Skarogne occupée
(niveau 1) (wh2_main_special_settlement_skavenblight_other_1) Level 1
Skarogne occupée
(niveau 2) (wh2_main_special_settlement_skavenblight_other_2) Level 2
Skarogne occupée
(niveau 3) (wh2_main_special_settlement_skavenblight_other_3) Level 3
Skarogne occupée
(niveau 4) (wh2_main_special_settlement_skavenblight_other_4) Level 4
La Renaissante occupée (niveau 1)
(wh2_main_special_settlement_the_awakening_vmp_1) Level 1
La Renaissante occupée (niveau 2)
(wh2_main_special_settlement_the_awakening_vmp_2) Level 2
La Renaissante occupée (niveau 3)
(wh2_main_special_settlement_the_awakening_vmp_3) Level 3
La Renaissante occupée (niveau 4)
(wh2_main_special_settlement_the_awakening_vmp_4) Level 4 |
|
|
Hameau décrépit
(wh_main_vmp_outpostnorsca_minor_1) Level 1
Hameau décrépit
(wh_main_vmp_outpostnorsca_minor_1_coast) Level 1
Hameau décrépit
(wh_main_vmp_settlement_minor_1) Level 1
Hameau décrépit
(wh_main_vmp_settlement_minor_1_coast) Level 1
Grande colonie elfique occupée
(wh2_main_special_settlement_colony_major_other_4) Level 4 |
|
|
Massif d'Orquemont occupé (niveau 1)
(wh2_dlc15_special_settlement_massif_orcal_vmp_1) Level 1
Massif d'Orquemont occupé (niveau 2)
(wh2_dlc15_special_settlement_massif_orcal_vmp_2) Level 2
Massif d'Orquemont occupé (niveau 3)
(wh2_dlc15_special_settlement_massif_orcal_vmp_3) Level 3
Massif d'Orquemont occupé (niveau 4)
(wh2_dlc15_special_settlement_massif_orcal_vmp_4) Level 4
Tor Yvresse occupée (niveau 1)
(wh2_dlc15_special_settlement_tor_yvresse_vmp_1) Level 1
Tor Yvresse occupée (niveau 2)
(wh2_dlc15_special_settlement_tor_yvresse_vmp_2) Level 2
Tor Yvresse occupée (niveau 3)
(wh2_dlc15_special_settlement_tor_yvresse_vmp_3) Level 3
Tor Yvresse occupée (niveau 4)
(wh2_dlc15_special_settlement_tor_yvresse_vmp_4) Level 4 |
|
| Disponibilité de la faction | |
|---|---|
| L'Œil du Vortex | |
| Empires Mortels | |
| Von Carstein (Empires Mortels) Unités |
|---|
| Commandes (25) |
5. |
14. |
23. |
| Infanterie de mêlée (19) |
26. |
33. |
35. |
| Cavalerie de mêlée (3) |
| Cavalerie de choc (3) |
| Char (6) |
| Navire de mêlée (4) |
Factions
Units
Units in Custom Battle
Buildings
Technologies
Household
Regions
Mercenaries
Total War: Rome II
Factions
Units
Auxiliary Corps
Units in Custom Battle
Buildings
Technologies
Household
Regions
Mercenaries
Total War: Rome II: MODs
Radious Total War Mod
Divide et Impera
Total War: Rome II: ICONs
BullGod's Unit Icons
Normal's Rome II_Units Icons
Factions
Units
Shogun 2: Rise of the Samurai
Shogun 2: Fall of the Samurai
Napoleon: Total War
Factions
Units
Empire: Total War
Factions
Units
Factions
Units
Army
Buildings
Mercenaries
Retinue
Traits
Regions
Ranking
Medieval II: Total War: Kingdoms
Medieval II - Americas
Medieval II - Britannia
Medieval II - Crusades
Medieval II - Tutonic
Broken Crescent 1.05
Broken Crescent 2.02
Stainless Steel 5.1b
Stainless Steel 6.1
Deus Lo Vult 5.7
Deus Lo Vult 6.0
HTF: Eagle of the Elbe 05
The Long Road 2.0
Lands to Conquer Gold
DarthMod 1.4D: The Last Episode
Das Heilige Romische Reich 06
Third Age 1.3
Third Age 1.4
Third Age 2.1
Third Age 3.1