

 Français
 Italiano
 Deutsch
 Español
 Русский
 Čeština
 Polski
 Türkçe
 Português (Brasil)
 한국어
한국어 简体中文
简体中文 正體中文
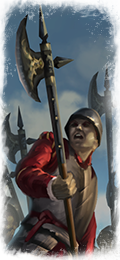
正體中文Halberdiers
Halberdiers are stalwart defenders, able to hold the line behind a wall of Halberds, cutting enemies to ribbons.State troops are paid as full-time professional soldiers, ready to answer the call to arms at all times. In addition to forming a standing army to repel enemy attack, they also serve as city guards, the fire watch and the enforcers of the law. However, most of the time these soldiers spend their days drilling and training to the barked instructions of grim-faced Sergeants. Each Imperial state trains its regiments to fight together, providing each other with mutual protection on the battlefield. A detachment of Spearmen or Halberdiers will bravely intercept the enemy, cutting them down with their bladed polearms.
 |
Unit Name Halberdiers |
Main Unit Key wh_main_emp_inf_halberdiers |
Land Unit Key wh_main_emp_inf_halberdiers |
Naval Unit Key wh_main_shp_transport |
Land Unit Group |
Naval Unit Group |
Soldiers 120 |
Caste Melee Infantry |
Category Melee Infantry |
Class Melee Infantry |
Cost 550 |
Recruitment Cost 550 |
Upkeep Cost 137 |
Melee Attack 26 |
Weapon Strength (Weapon Damage) 28 |
├ Melee Weapon wh_main_emp_halberd |
├ Melee Damage Base 8 |
├ Melee Damage Ap 20 |
├ Armour Piercing No |
├ Bonus vs Cavalry 0 |
├ Bonus vs Elephants 16 |
└ Bonus vs Infantry 0 |
Charge Bonus 8 |
Melee Defence 42 |
├ Base Defence 42 |
├ Shield none |
└ Shield Defence 0 |
Armour 30 |
├ Armour wh2_main_chainmail_30 |
├ Armour Defence 30 |
└ Shield Armour 0 |
Health 73 |
├ Man Entity wh_main_infantry_standard_blood_dismembers |
├ Man Speed 30 |
├ Man Health 8 |
└ Bonus Hit Points 65 |
Leadership (Base Morale) 70 |
Abilities
No Ability
Attributes
- Charge Defence vs. Large
When bracing, this unit negates the charge bonus of any large attacker. - Hide (forest)
This unit can hide in forests until enemy units get too close.
Strengths & Weaknesses
- Armour-Piercing
The damage of armour-piercing weapons mostly ignores the armour of the target, making them the ideal choice against heavily-armoured enemies. They are often heavier and attack at a slower rate though, making them less efficient against poorly-armoured targets. - Charge Defence Against Large Foes
When standing and bracing against a charge of large enemies (such as cavalry or monsters) this unit will negate the enemy's charge bonus. - Anti-Large
Anti-large units have an advantage against targets that are at least as large as a horse. This advantage can be a damage bonus against large targets or an attack that focuses on a very small area. However, some units are simply better against large targets because their attacks are slow and easy to dodge by skilled melee combatants.
| Requires Buildings | |
|---|---|
|
Gathering Place
(wh2_main_horde_rogue_settlement_1) Level 0
Military Encampment
(wh2_main_horde_rogue_settlement_2) Level 1
Small Occupied Settlement
(wh2_main_rogue_outpostnorsca_major_1) Level 1
Occupied Settlement
(wh2_main_rogue_outpostnorsca_major_2) Level 2
Large Occupied Settlement
(wh2_main_rogue_outpostnorsca_major_3) Level 3
Small Occupied Settlement
(wh2_main_rogue_outpostnorsca_major_coast_1) Level 1
Occupied Settlement
(wh2_main_rogue_outpostnorsca_major_coast_2) Level 2
Large Occupied Settlement
(wh2_main_rogue_outpostnorsca_major_coast_3) Level 3
Small Occupied Settlement
(wh2_main_rogue_outpostnorsca_minor_1) Level 1
Occupied Settlement
(wh2_main_rogue_outpostnorsca_minor_2) Level 2
Large Occupied Settlement
(wh2_main_rogue_outpostnorsca_minor_3) Level 3
Small Occupied Settlement
(wh2_main_rogue_outpostnorsca_minor_coast_1) Level 1
Occupied Settlement
(wh2_main_rogue_outpostnorsca_minor_coast_2) Level 2
Large Occupied Settlement
(wh2_main_rogue_outpostnorsca_minor_coast_3) Level 3
Small Occupied Settlement
(wh2_main_rogue_settlement_major_1) Level 1
Occupied Settlement
(wh2_main_rogue_settlement_major_2) Level 2
Large Occupied Settlement
(wh2_main_rogue_settlement_major_3) Level 3
Small Occupied Settlement
(wh2_main_rogue_settlement_major_coast_1) Level 1
Occupied Settlement
(wh2_main_rogue_settlement_major_coast_2) Level 2
Large Occupied Settlement
(wh2_main_rogue_settlement_major_coast_3) Level 3
Small Occupied Settlement
(wh2_main_rogue_settlement_minor_1) Level 1
Occupied Settlement
(wh2_main_rogue_settlement_minor_2) Level 2
Large Occupied Settlement
(wh2_main_rogue_settlement_minor_3) Level 3
Small Occupied Settlement
(wh2_main_rogue_settlement_minor_coast_1) Level 1
Occupied Settlement
(wh2_main_rogue_settlement_minor_coast_2) Level 2
Large Occupied Settlement
(wh2_main_rogue_settlement_minor_coast_3) Level 3
Forest Encampment
(wh2_main_special_settlement_athel_loren_rogue_1) Level 1 |
|
| Garrison Buildings | |
|---|---|
|
The Maelstrom
(wh2_dlc11_special_settlement_galleons_graveyard_other_1) Level 1
Occupied Hell Pit Level 3
(wh2_main_special_settlement_hellpit_other_3) Level 3
Occupied Hell Pit Level 4
(wh2_main_special_settlement_hellpit_other_4) Level 4
Occupied Hell Pit Level 5
(wh2_main_special_settlement_hellpit_other_5) Level 5
Occupied Skavenblight Level 3
(wh2_main_special_settlement_skavenblight_other_3) Level 3
Occupied Skavenblight Level 4
(wh2_main_special_settlement_skavenblight_other_4) Level 4
Occupied Skavenblight Level 5
(wh2_main_special_settlement_skavenblight_other_5) Level 5 |
|
|
Small Occupied Settlement
(wh2_main_rogue_outpostnorsca_major_1) Level 1
Occupied Settlement
(wh2_main_rogue_outpostnorsca_major_2) Level 2
Large Occupied Settlement
(wh2_main_rogue_outpostnorsca_major_3) Level 3
Small Occupied Settlement
(wh2_main_rogue_outpostnorsca_major_coast_1) Level 1
Occupied Settlement
(wh2_main_rogue_outpostnorsca_major_coast_2) Level 2
Large Occupied Settlement
(wh2_main_rogue_outpostnorsca_major_coast_3) Level 3
Small Occupied Settlement
(wh2_main_rogue_outpostnorsca_minor_1) Level 1
Occupied Settlement
(wh2_main_rogue_outpostnorsca_minor_2) Level 2
Large Occupied Settlement
(wh2_main_rogue_outpostnorsca_minor_3) Level 3
Small Occupied Settlement
(wh2_main_rogue_outpostnorsca_minor_coast_1) Level 1
Occupied Settlement
(wh2_main_rogue_outpostnorsca_minor_coast_2) Level 2
Large Occupied Settlement
(wh2_main_rogue_outpostnorsca_minor_coast_3) Level 3
Small Occupied Settlement
(wh2_main_rogue_settlement_major_1) Level 1
Occupied Settlement
(wh2_main_rogue_settlement_major_2) Level 2
Large Occupied Settlement
(wh2_main_rogue_settlement_major_3) Level 3
Small Occupied Settlement
(wh2_main_rogue_settlement_major_coast_1) Level 1
Occupied Settlement
(wh2_main_rogue_settlement_major_coast_2) Level 2
Large Occupied Settlement
(wh2_main_rogue_settlement_major_coast_3) Level 3
Small Occupied Settlement
(wh2_main_rogue_settlement_minor_1) Level 1
Occupied Settlement
(wh2_main_rogue_settlement_minor_2) Level 2
Large Occupied Settlement
(wh2_main_rogue_settlement_minor_3) Level 3
Small Occupied Settlement
(wh2_main_rogue_settlement_minor_coast_1) Level 1
Occupied Settlement
(wh2_main_rogue_settlement_minor_coast_2) Level 2
Large Occupied Settlement
(wh2_main_rogue_settlement_minor_coast_3) Level 3
Forest Encampment
(wh2_main_special_settlement_athel_loren_rogue_1) Level 1 |
|
|
Occupied Elven Colony
(wh2_main_special_settlement_colony_major_other_3) Level 3
Thriving Occupied Elven Colony
(wh2_main_special_settlement_colony_major_other_5) Level 5
Occupied Elven Colony
(wh2_main_special_settlement_colony_minor_other_3) Level 3 |
|
| Faction Availability | |
|---|---|
| The Eye of the Vortex | |
| Mortal Empires | |
Factions
Units
Units in Custom Battle
Buildings
Technologies
Household
Regions
Mercenaries
Total War: Rome II
Factions
Units
Auxiliary Corps
Units in Custom Battle
Buildings
Technologies
Household
Regions
Mercenaries
Total War: Rome II: MODs
Radious Total War Mod
Divide et Impera
Total War: Rome II: ICONs
BullGod's Unit Icons
Normal's Rome II_Units Icons
Factions
Units
Shogun 2: Rise of the Samurai
Shogun 2: Fall of the Samurai
Napoleon: Total War
Factions
Units
Empire: Total War
Factions
Units
Factions
Units
Army
Buildings
Mercenaries
Retinue
Traits
Regions
Ranking
Medieval II: Total War: Kingdoms
Medieval II - Americas
Medieval II - Britannia
Medieval II - Crusades
Medieval II - Tutonic
Broken Crescent 1.05
Broken Crescent 2.02
Stainless Steel 5.1b
Stainless Steel 6.1
Deus Lo Vult 5.7
Deus Lo Vult 6.0
HTF: Eagle of the Elbe 05
The Long Road 2.0
Lands to Conquer Gold
DarthMod 1.4D: The Last Episode
Das Heilige Romische Reich 06
Third Age 1.3
Third Age 1.4
Third Age 2.1
Third Age 3.1